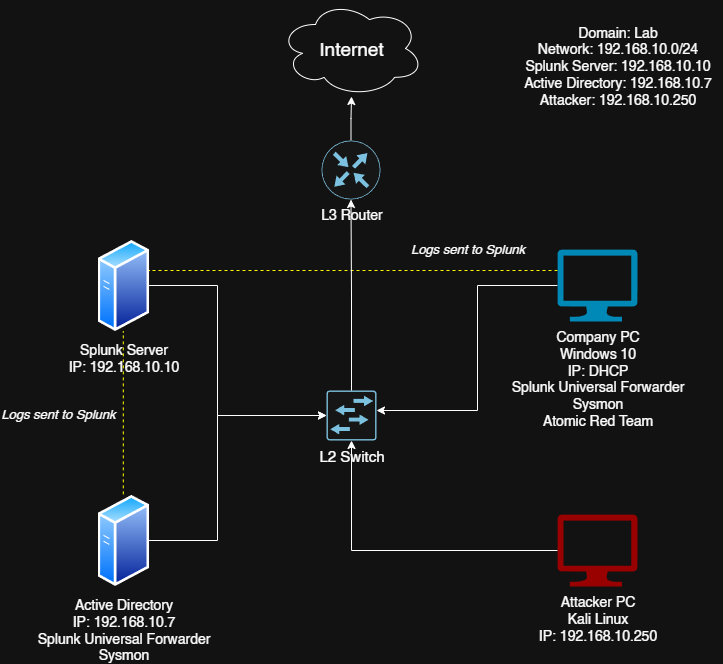
Active Directory Home Lab Part 3
In the previous parts, we set up our virtual machines, configured networking, and installed Splunk with Sysmon for logging on both Windows machines. Now we’ll be installing and configuring Active Directory Domain Services on our Windows Server, promoting it to a Domain Controller, and finally joining our target machine to the newly created domain.
Installing Active Directory Domain Services
Now let’s install Active Directory Domain Services (ADDS) on our Windows Server.
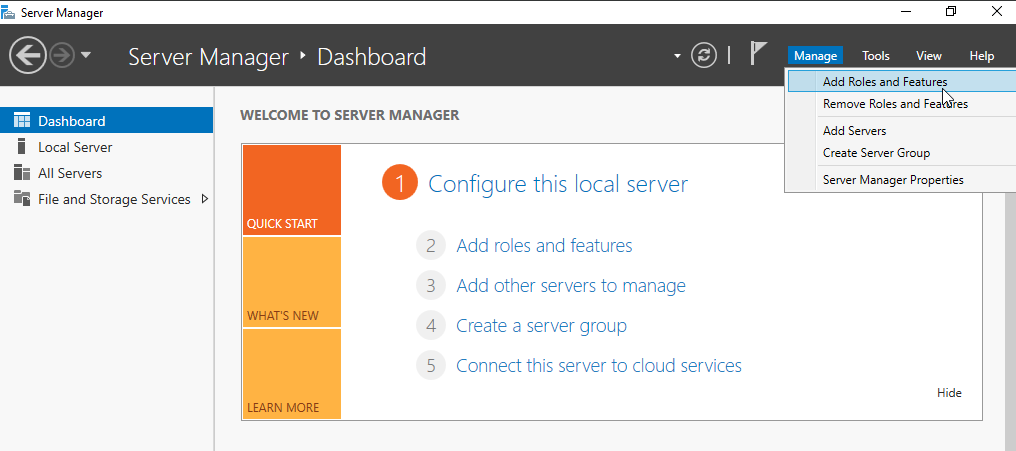
Open Server Manager. In the top-right corner, click Manage and select Add Roles and Features.
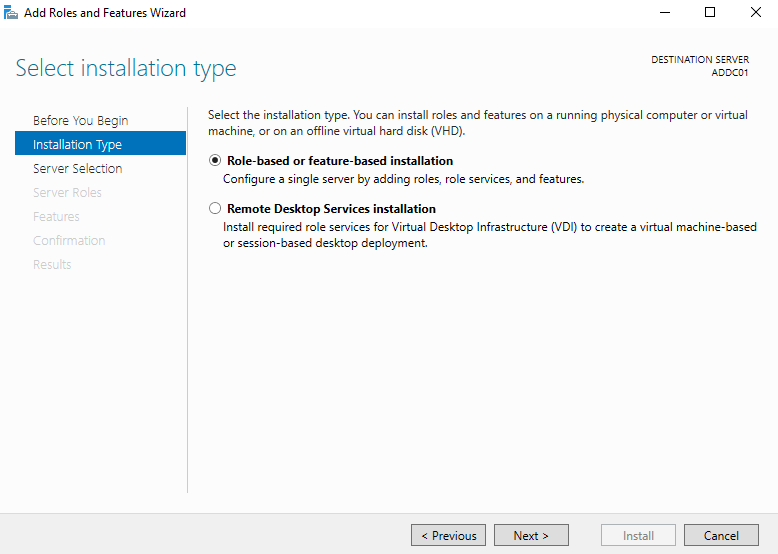
Click Next and make sure Role-based or feature-based installation is selected.
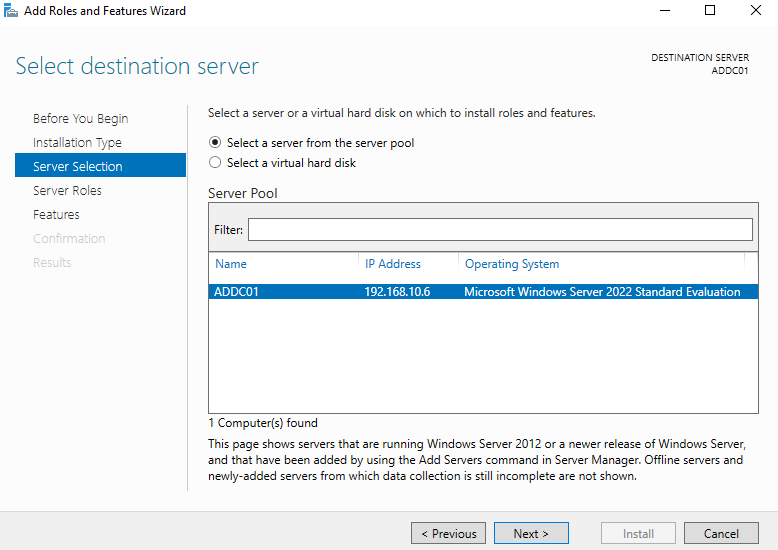
Click Next. Our server should be listed and selected (since we only have one server).
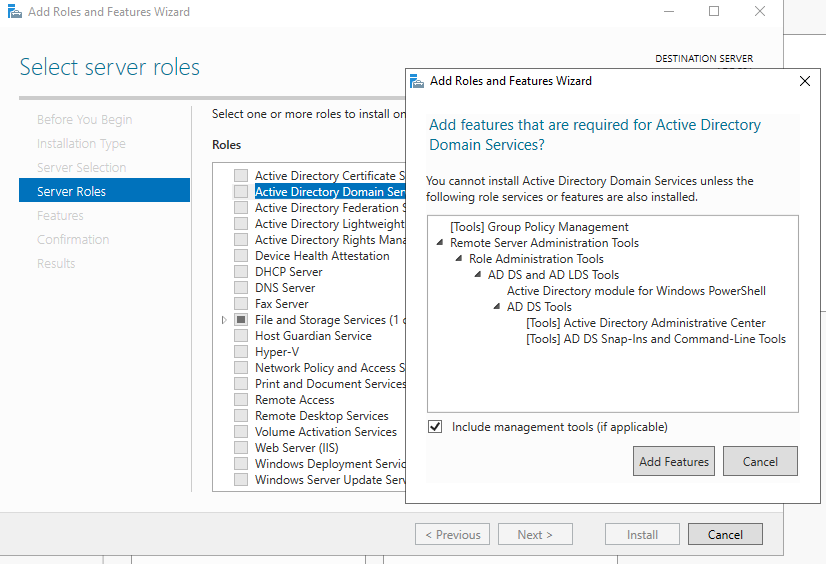
Click Next and select Active Directory Domain Services. When prompted, click Add Features to include the management tools.
Keep clicking Next until you reach the Install button, then click Install.
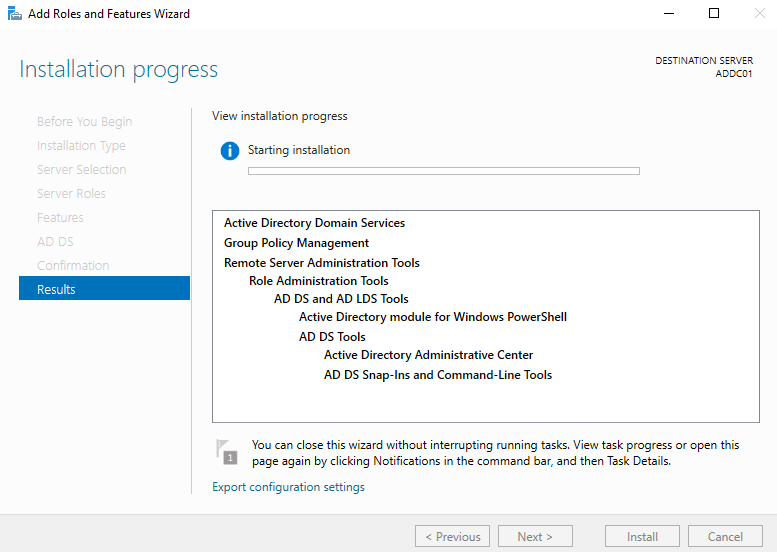
The installation will take a few minutes. Wait until you see Installation succeeded on ADDC01 in the progress bar.
Promoting to Domain Controller
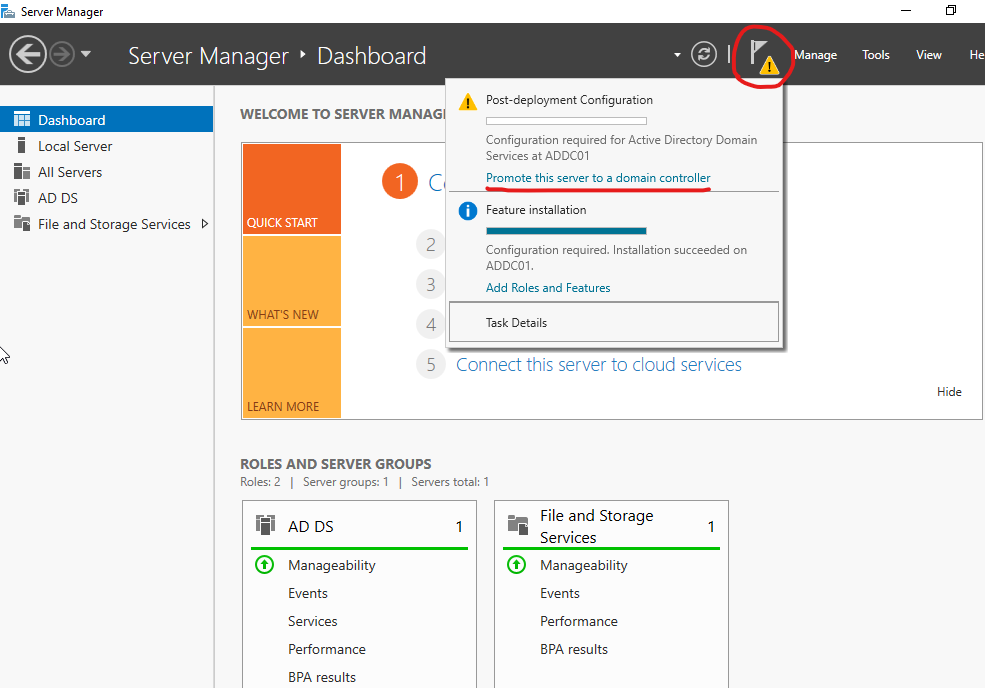
After installing ADDS, we need to promote our server to a Domain Controller. Click the flag icon next to Manage in Server Manager. Click on it and select Promote this server to a domain controller.
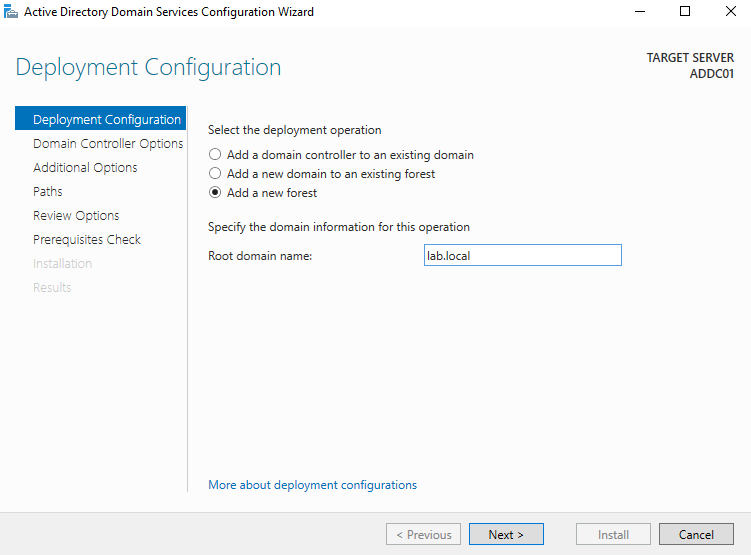
On the Deployment Configuration screen, select Add a new forest since we’re creating a new domain.
For the Root domain name, enter lab.local. The domain name must have a top-level domain, so it can’t simply be lab - it needs to be lab.something. You could use lab.test or any other extension, but I’ll use .local. Click Next.
Leave all the default settings and enter a Directory Services Restore Mode (DSRM) password. This is used for recovery purposes.
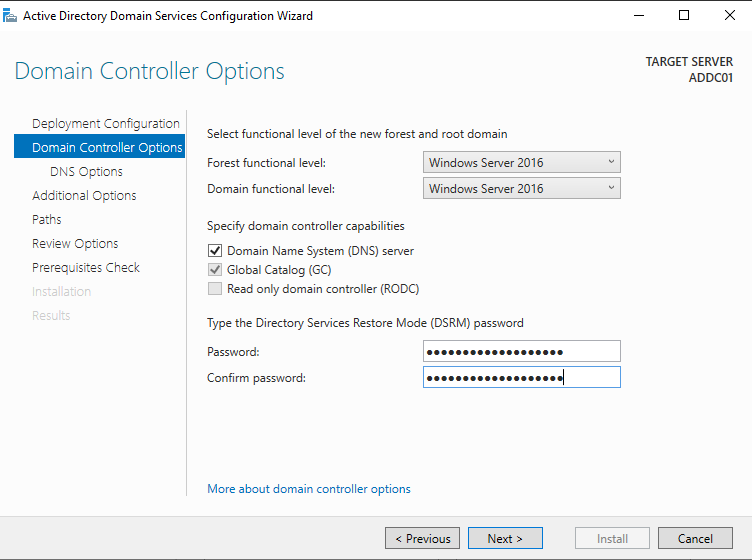
Click Next through the following screens:
- DNS Options (Next)
- Additional Options (Next)
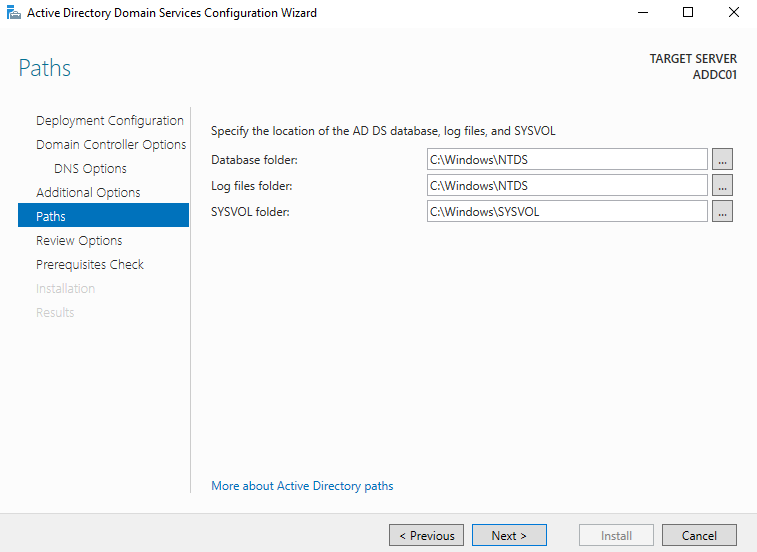
- Paths (Next)
Note: The paths shown below are where Active Directory stores its database files, including the important
NTDS.ditfile. Attackers often target Domain Controllers not only for their access to everything, but specifically for this file as it contains everything related to Active Directory, including password hashes. Any unauthorized activity toward this file should be considered a sign that your entire domain is compromised.
Continue clicking Next until the system finishes verifying prerequisites, then click Install.

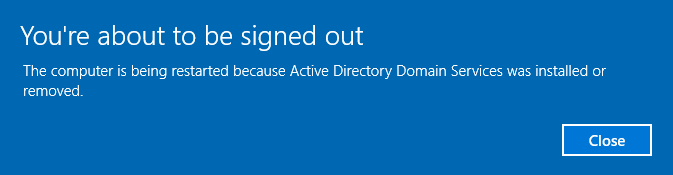
Once the setup is complete, the server will automatically restart. You’ll see a message saying “You’re about to be signed out”. This is normal.
After the server restarts, log back in. You should now see the domain name followed by a backslash in the login screen, which indicates we’ve successfully installed ADDS and promoted our server to a Domain Controller.
Creating Users and Organizational Units
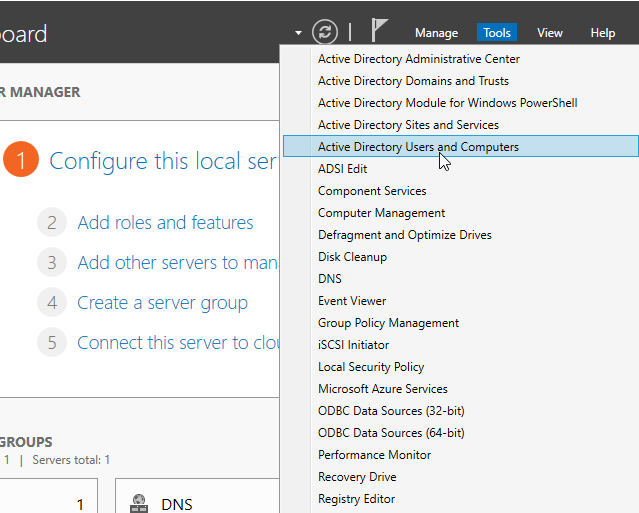
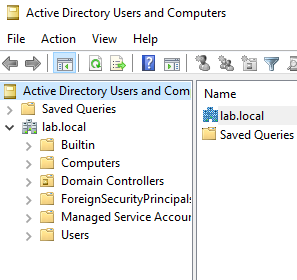
Now let’s create some users to populate our domain. In Server Manager, click Tools in the top-right corner and select Active Directory Users and Computers.
This is where we can create objects such as users, computers, groups, and organizational units.
Expand our domain (lab.local) and you’ll see several folders:
- Builtin
- Computers
- Domain Controllers
- Users
- And others
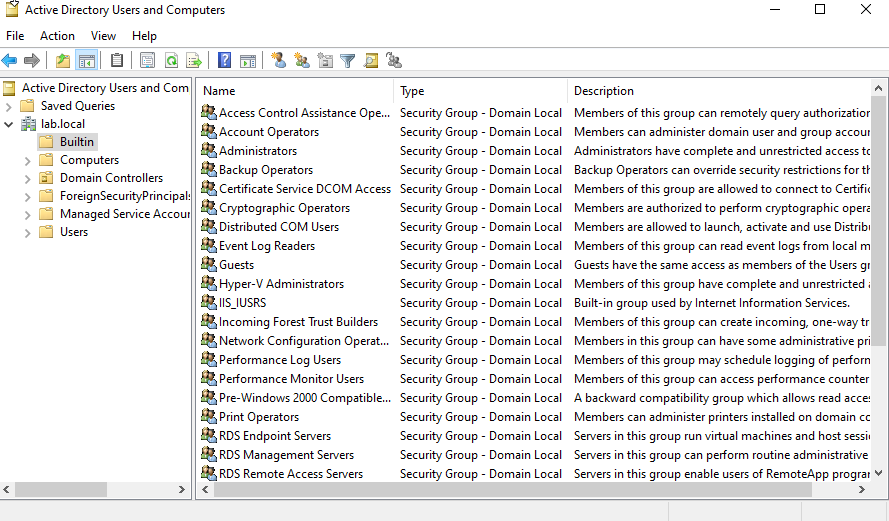
Click on Builtin to see all the groups that have been automatically created by Active Directory. You can double-click any group (like Administrators) to see its description, members, and what other groups it belongs to.
Important: You cannot add additional groups within a built-in group, but you can create custom groups and add built-in groups to those custom groups.
Creating Organizational Units
In a real-world environment, users are typically organized into departments using Organizational Units (OUs). Let’s create some OUs to mimic this structure.
Right-click our domain (lab.local), go to New, and select Organizational Unit.
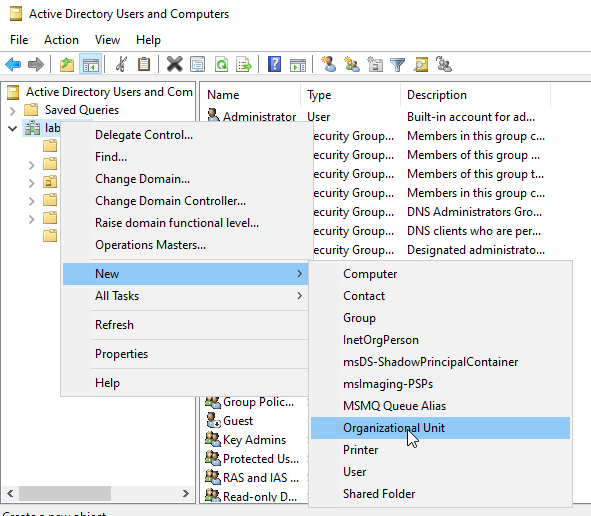
Name the first OU IT and click OK.
Create another OU called HR using the same process.
Creating Users
Now let’s create users in these OUs. Right-click the IT OU, select New, then User.
Create the first user:
- First name:
Bobby - Last name:
Smith - User logon name:
bsmith
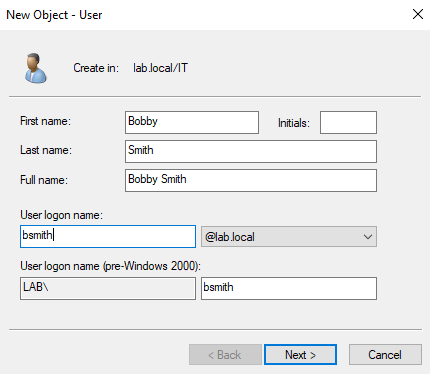
Click Next, set a password, and since this is a lab environment, uncheck User must change password at next logon.
Click Next and Finish.
Now create another user in the HR OU:
- First name:
John - Last name:
Smith - User logon name:
jsmith
Set a password and uncheck User must change password at next logon.
Note: There are many scripts available that can help you auto-create users, groups, and computers, but for this project, we’ll keep it simple with just these two users.
Joining the Company Machine to the Domain
Now that we have our Active Directory set up and our server is a Domain Controller, let’s join our Windows 10 Company machine to the newly created domain.
Updating DNS Settings
Before joining the domain, we need to update our Company machine’s DNS settings to point to our Domain Controller.
On the Company machine, right-click the network icon and select Open Network & Internet Settings -> Change adapter options -> right-click the adapter -> Properties -> Internet Protocol Version 4 (TCP/IPv4) -> Properties.
Change the Preferred DNS server from 8.8.8.8 to 192.168.10.7 (our Domain Controller’s IP address).
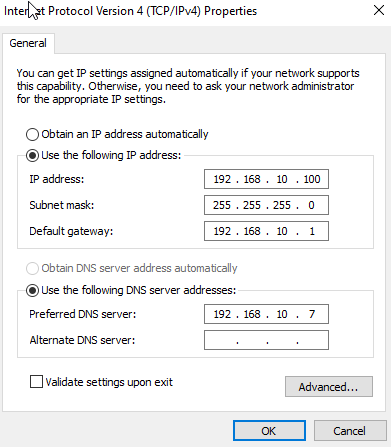
Click OK and OK again.
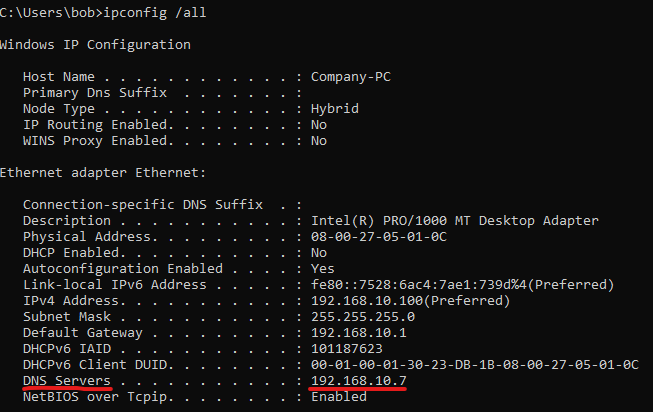
Verify the change by opening Command Prompt and running:
ipconfig /all
You should see the DNS server is now pointing to 192.168.10.7.
Joining the Domain
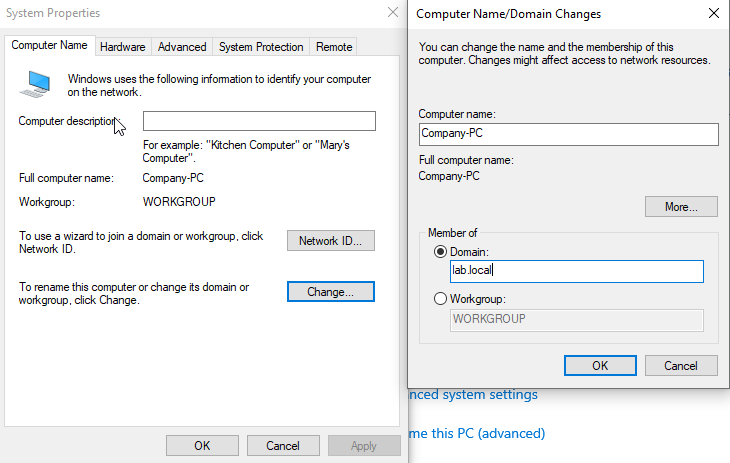
Search for This PC, click Properties, scroll down and then click Advanced system settings. Click on the Computer Name tab and select Change.
Select Domain and enter our domain name: lab.local
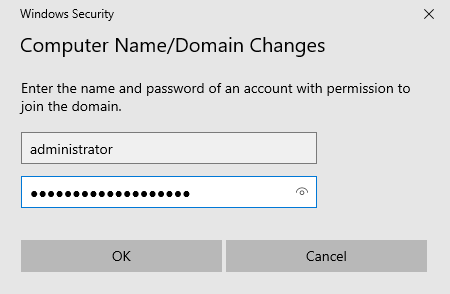
Click OK. You’ll be prompted for credentials. Use the administrator account of the server, as this account has the proper permissions to join computers to the domain:
- Username:
administrator - Password: [Your administrator password]
Note: In a real-world environment, you would create specific users and put them into custom groups that are authorized to join computers to the domain, rather than using the built-in administrator account.
If successful, you’ll see a welcome message: Welcome to the lab.local domain.
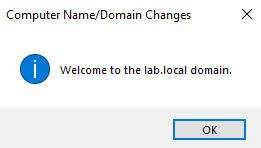
Click OK, then OK again. You’ll be prompted to restart the computer - click Restart Now.
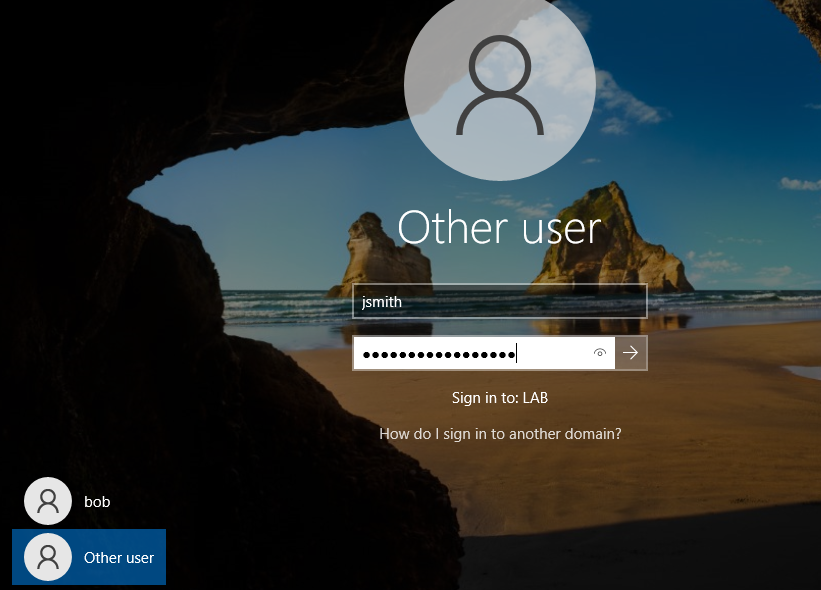
Logging in as a Domain User
After the restart, on the login screen, click Other user. You should see that the Sign in to field is set to lab (our domain).
Log in with one of our newly created users:
- Username:
jsmith - Password: [John’s password]
Now we’ve successfully:
- Installed Active Directory Domain Services
- Promoted your server to a Domain Controller
- Created organizational units and users
- Joined a computer to the domain
- Logged in as a domain user
Taking Snapshots
Before we proceed further, it’s important to take snapshots of all our virtual machines. This way, if you break something during testing (which we should never be afraid of), you can always restore to a known good state.
In VirtualBox, right-click each VM and select Snapshots, then Take Snapshot. Give each snapshot a name like “AD Lab - Post Domain Setup”.
What’s Next?
We now have a fully functional Active Directory environment. In the next and final part of this series, we’ll use Kali Linux to perform attacks against our domain and set up Atomic Red Team on our Windows Target machine to generate telemetry that we can analyze in Splunk.