Active Directory Home Lab Part 1
I wanted to get some hands-on experience with Active Directory and Splunk, so I figured I would set up a home lab.
This can serve as a tutorial for anyone wanting to build an Active Directory home lab, where you can simulate attacks and a SIEM solution for logs.
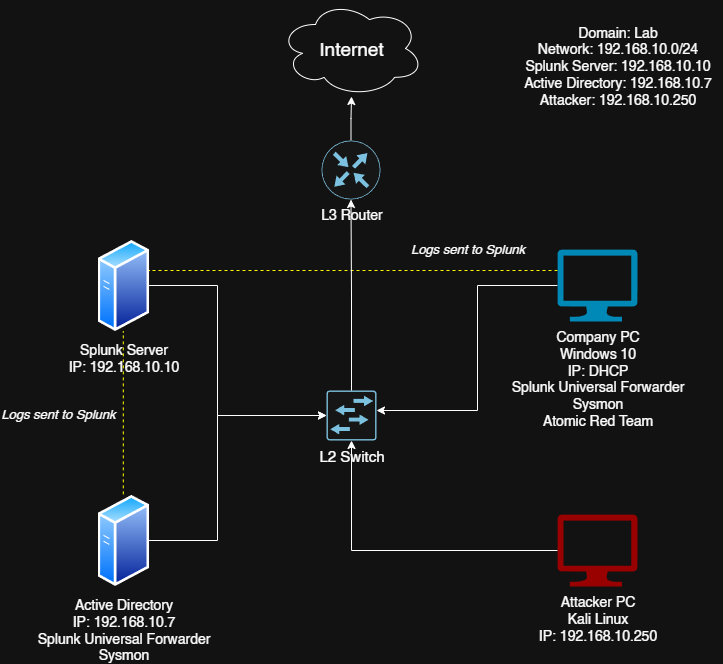
Before jumping into it straight away, I decided to make a diagram with the different systems and solutions I would use:
- Company PC running Windows 10
- Attacker PC running Kali Linux
- Active Directory running on Windows Server 2022
- Splunk SIEM running on Ubuntu Server
What is Active Directory? (High Level Overview)
Active Directory is a database that contains objects such as:
- Users
- Groups
- Computers
- Security Policies
- And much more
These objects will contain attributes that hold information about that object. An example would be:
- User Object:
Bob
- Attributes:
- First Name =
Bob - Last Name =
Smith - Age =
31
- First Name =
In order to use Active Directory a server must install a service called Active Directory Domain Service or ADDS for short. Then the server must be promoted to a Domain Controller or DC for short. This allows the server to perform authentication using a protocol called Kerberos and authorization for our domain.
Prerequisites
Some prerequisites for your host system is:
- Windows OS
- 250 GB of storage (not all will be used, but it’s recommended to have some breathing room)
- 16 GB of RAM
- 7-Zip
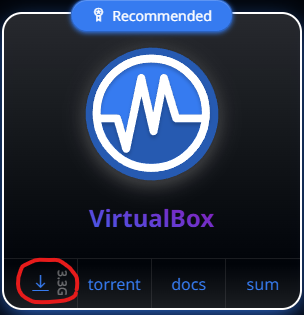
VirtualBox
To host this home lab, we’ll use VirtualBox to simulate a real-ish corporate environment. VirtualBox is a virtualization software that can be downloaded from here. VirtualBox is fairly easy to install, but if needed here is a youtube tutorial.
Downloading and Installing Windows 10
For the company machine we’re gonna be using Windows 10. Head over to Microsofts website to download the Windows 10 Installation Media:
Open the downloaded MediaCreationTool_22H2.exe. The tool will need administrator privileges.
Accept the License Agreements. Then we’ll be presented with this screen:
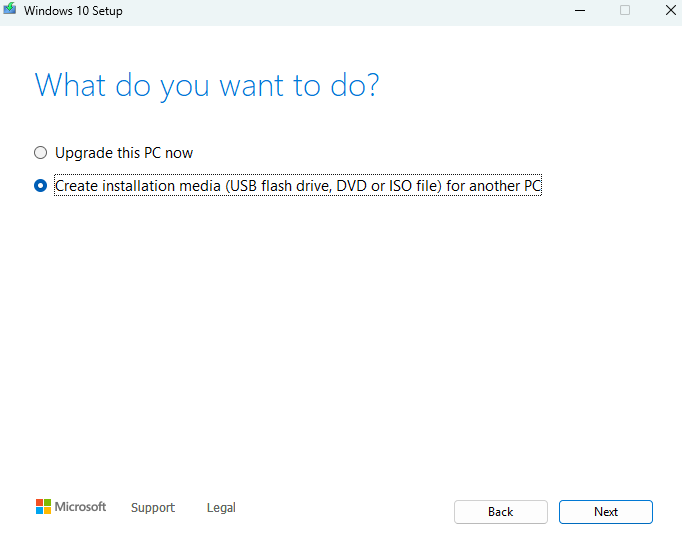
Check Create Installation Media and click next.
You can customize the Windows 10 settings if you want, but the recommended options are fine. Click next.
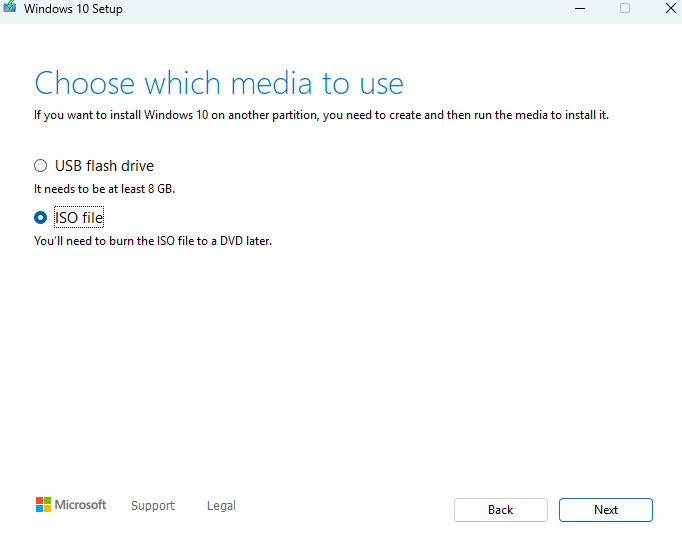
We are presented with the option of which media to use. Check the ISO file option and click next. You can then save the ISO to whatever place you want on your host pc.
Once the Installation Media is finished downloading, we can move on to the next step.
VirtualBox Windows 10 Setup
Open VirtualBox and click New.
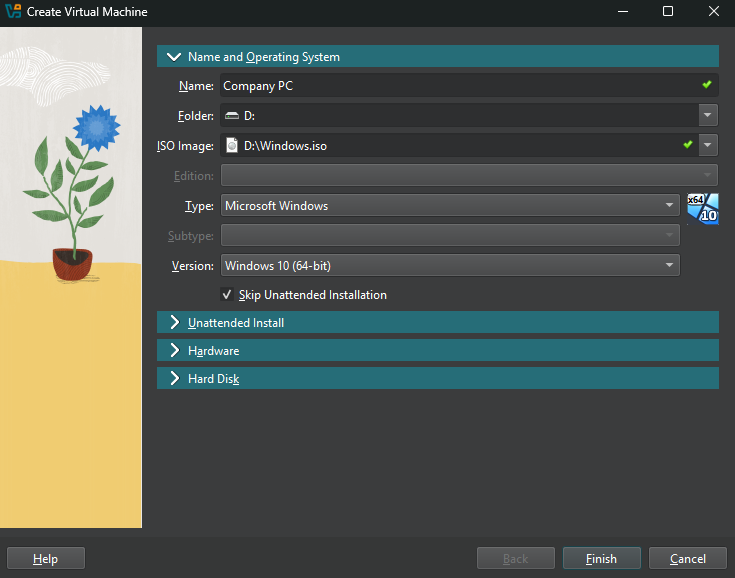
We are now presented with a screen where we need to choose:
- A name for our virtual machine
- The location of where to store the virtual machines data
- The location of the ISO image
- The version of the operating system we are installing
Make sure to check the Skip Unattended Install box.
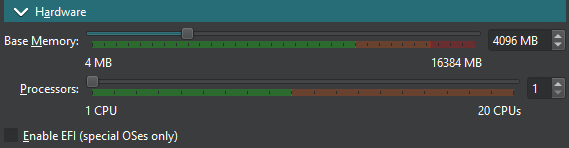
Now go to the Hardware tab. We should use 4096 MB of Base Memory and 1 Processor:
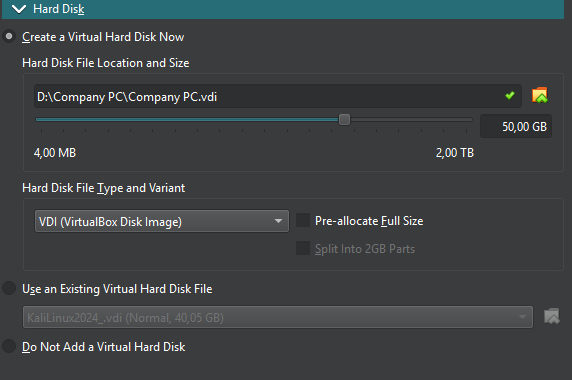
Leave the Hard Disk settings as is, with 50 GB of storage and using VDI. Click finish.
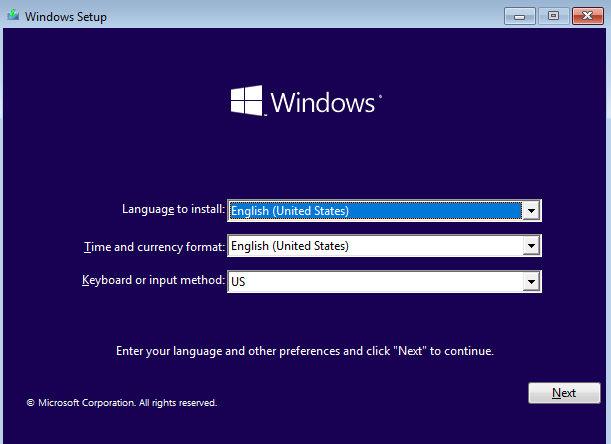
We can now boot up our brand new Company Windows 10 Machine by clicking Start. Choose the language and keyboard settings you want on the machine, and then click Next and then Install Now:
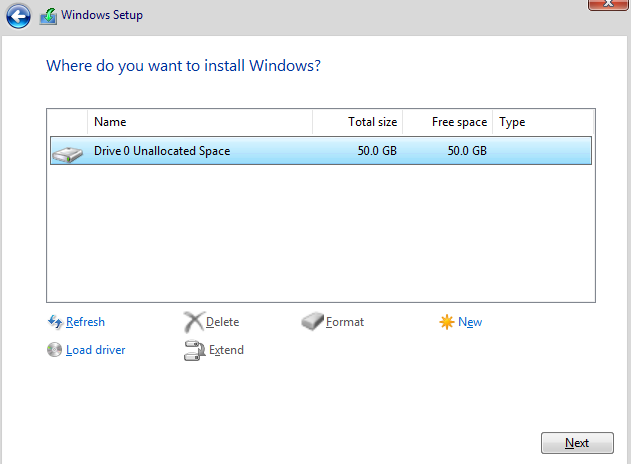
On the Activate Windows screen, click I don’t have a product key. Then choose Windows 10 Pro. Accept the License Agreements and click Next. Choose the Custom: Install Windows Only (Advanced) option.
Then click the Drive 0 Unallocated Space and click Next.
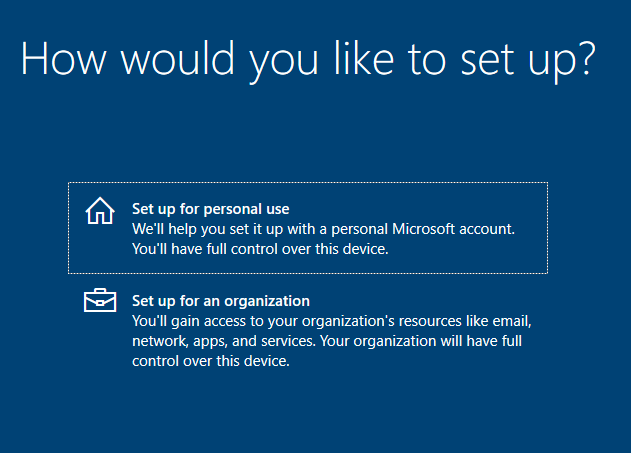
Windows will now be begin to be installed on the virtual machine. Once it’s finished you pick your region and keyboard layout. Make sure to pick Set Up For An Organization and click next.
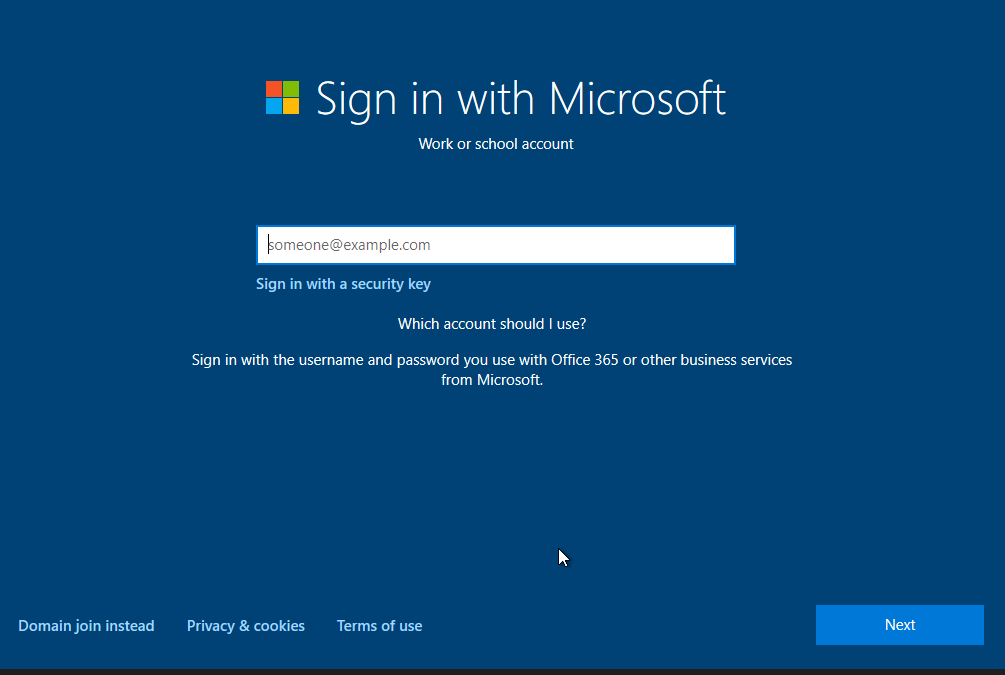
In the bottom left corner click Domain Join Instead. This will skip Microsofts account requirement and allow us to create a local user on the machine.
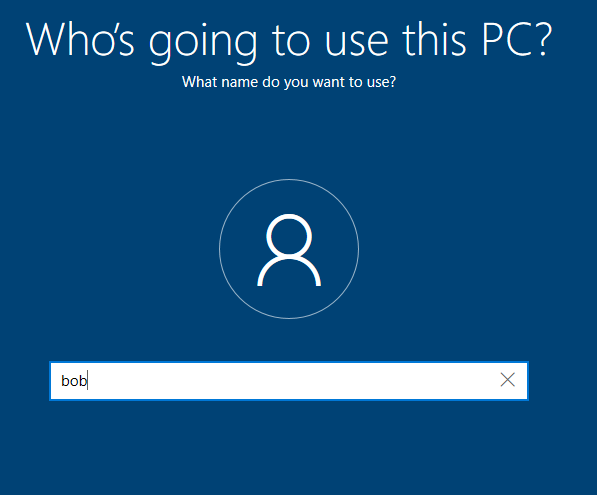
Choose a name for the pc (bob) and click Next.
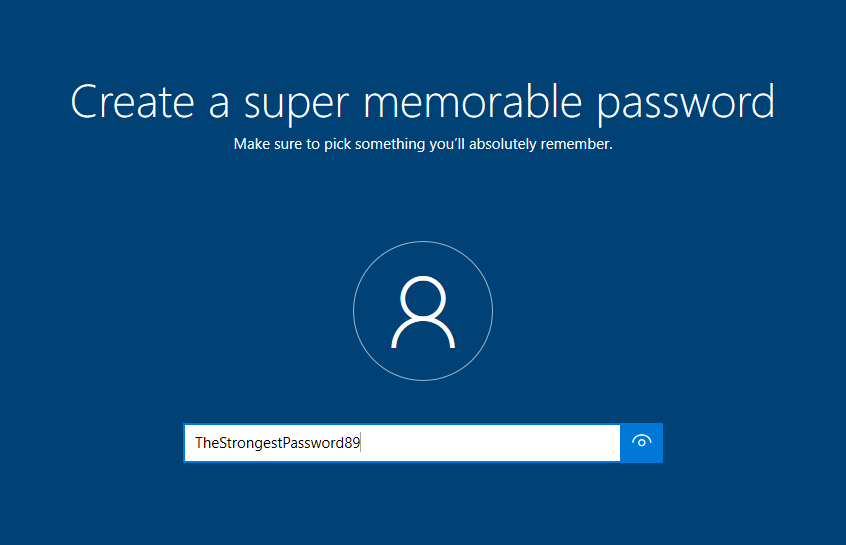
Choose a password for the pc (TheStrongestPassword89)and click Next.
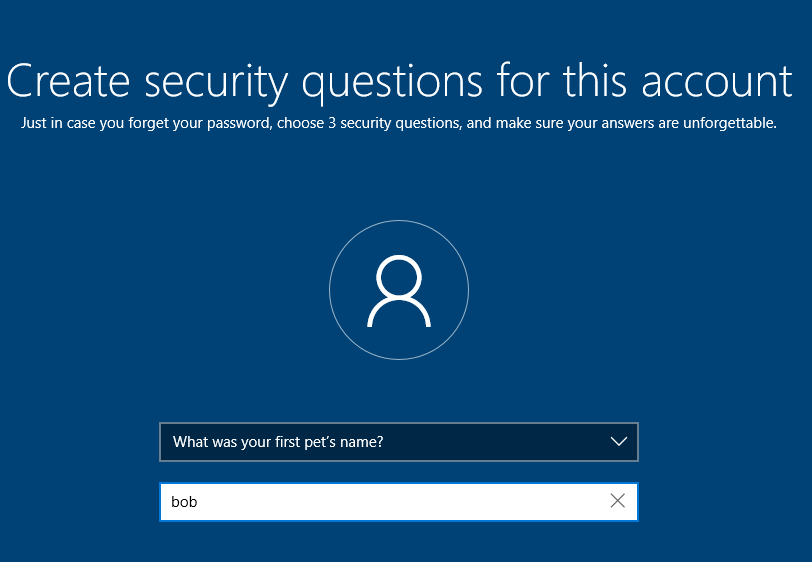
Choose three security questions for the pc (I used bob for all three)
For the next screens, we can just skip them or click the minimal amount of data being sent to Microsoft. Now Windows will be installing on the machine.
Minor Windows Configuration
Once we are in, we need to change a couple of settings.
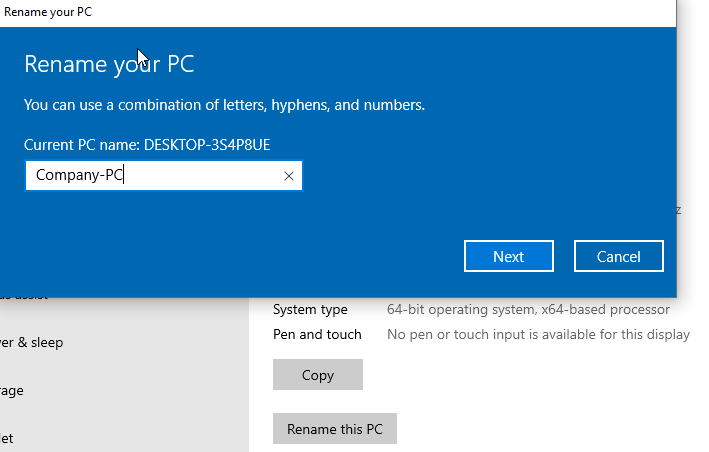
The first is the Hostname of the machine. To change it, search for This PC and click Properties.

Click Rename this PC and change it to Company-PC or whatever you want. Click Restart Now. Now our Hostname is what we changed it to.
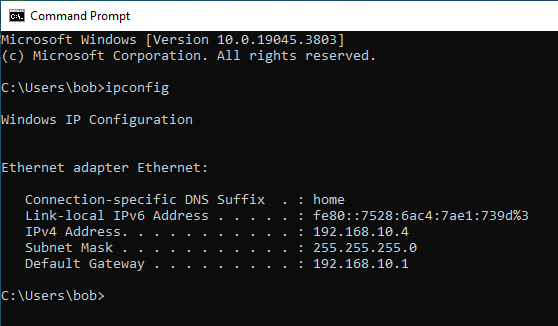
The other configuration we need to make, is to statically set our IP address for this machine. If we open a Command Prompt we can type ipconfig and see our current IP address:
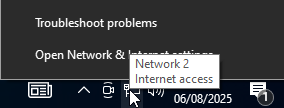
To change this right click the Network icon in the bottom right and click Open Network & Internet Settings.
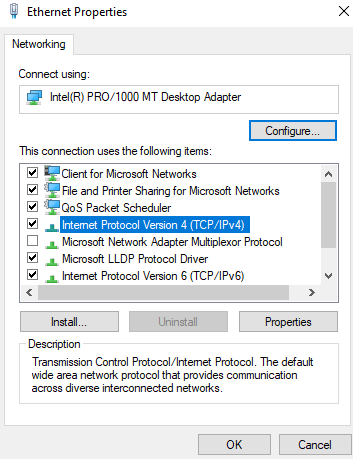
Scroll down and under Advanced network settings click Change adapter options. Then right click the ethernet network and click Properties. Double click Internet Protocol Version 4 (TCP/IPv4):
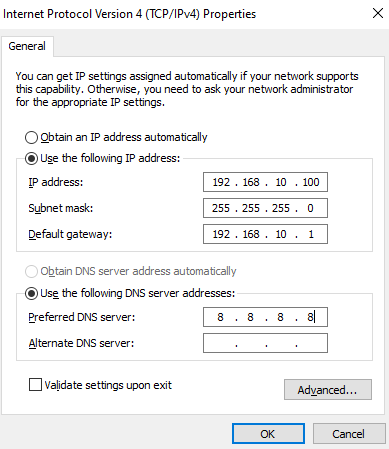
Change Obtain an IP address automatically to Use the following IP address.
- Set the static IP we picked in the diagram (
192.168.10.100). - The network is a
/24, so the Subnet mask should be255.255.255.0. - The Default gateway is
192.168.10.1. - The Preferred DNS Server is
8.8.8.8for now, but this will eventually point to our AD server.
Click Ok to apply the changes
If we now type ipconfig in a Command Prompt, we will see the settings we just configured:
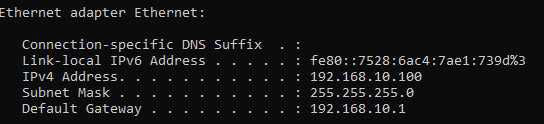
This is the Windows 10 setup for now and we can move on to setting up Kali Linux
Downloading and Installing Kali Linux
Kali Linux is an open-source Debian-based Linux distribution made for Penetration Testing, Computer Forensics and Reverse Engineering. It comes with a lot of ready to go applications for attacking the company machine.
Before installing Kali Linux we need to install 7-Zip, because Kali Linux comes in a .7z archive.
To download Kali Linux head over to the Kali website and click Virtual Machines. Then click the download button on VirtualBox and save it to your pc:
Once the download is finished, unzip the archive with 7-zip by right clicking the archive, and then clicking Show more options. Then hover over 7-Zip and click Extract To kali-linux-2025.2-virtualbox-amd64 (The file name might be different for you).
Once the extraction is complete, just double click the .vbox file in the new folder. This will automatically import it into VirtualBox. The default credentials for Kali Linux is:
- Username:
kali
- Password:
kali
We’ll finalize the setup later in the series.
Downloading and Installing the Windows Server
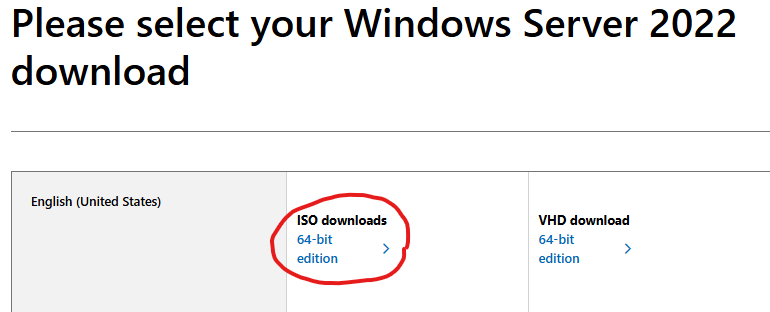
Navigate over to the Microsoft website. Under Get started for free click Download the ISO and then enter some information. Then click the 64-bit english ISO download and save it on your pc:
Note: This evaluation edition of Windows Server expires in 180 days.
Once the download is complete, move on to the next step.
VirtualBox Windows Server Setup
Open up VirtualBox and click New.
We are now presented with a screen where we need to choose:
- A name for our virtual machine
- The location of where to store the virtual machines data
- The location of the ISO image
- The version of the operating system we are installing
Make sure to check the Skip Unattended Install box.

Now go to the Hardware tab. We should use 4096 MB of Base Memory and 1 Processor:
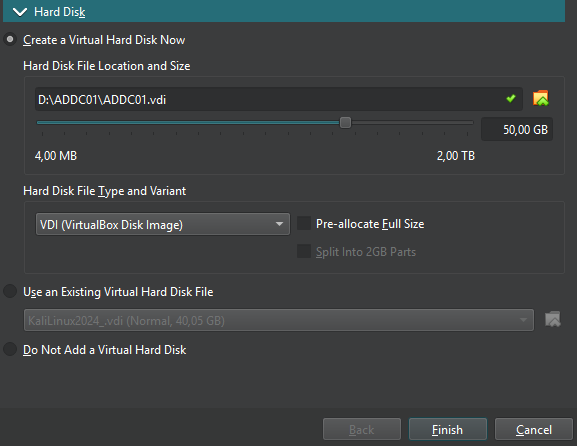
Leave the Hard Disk settings as is, with 50 GB of storage and using VDI. Click finish.
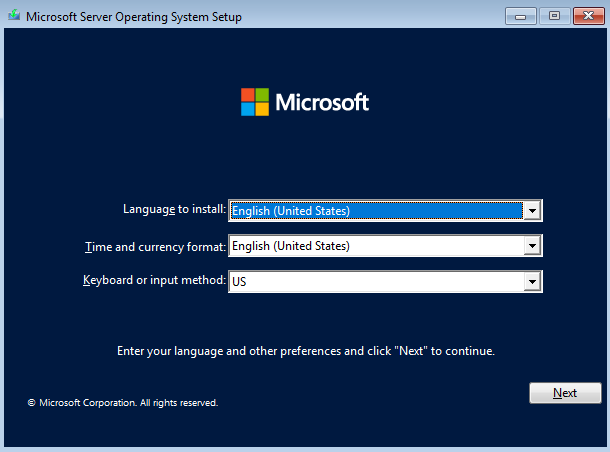
Now we can click Start on the ADDC01. Choose the language and keyboard settings you want on the machine, and then click Next and then Install Now:
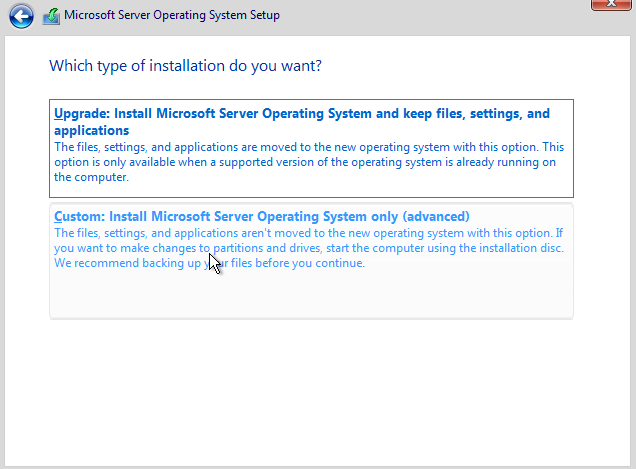
On the Activate Windows screen, click I don’t have a product key. Then choose Windows Server 2022 Standard Evaluation (Desktop Experience). Accept the License Agreements and click Next. Choose the Custom: Install Microsoft Server Operating System only (Advanced) option.
Then click the Drive 0 Unallocated Space and click Next.
Windows Server will now be begin to be installed on the virtual machine.
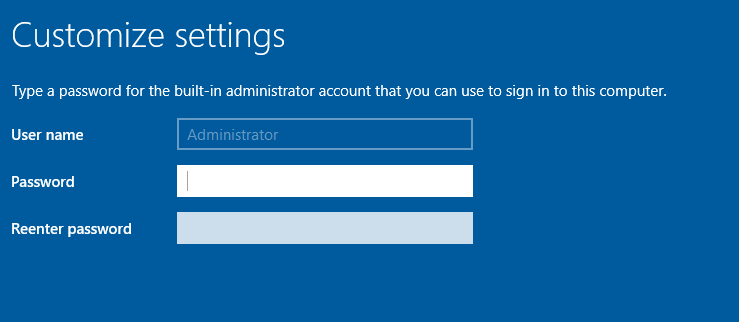
When the installation is done, we’ll need to choose a password for the Windows Server. After typing your password, click finish (I chose VeryStrongPassword98):
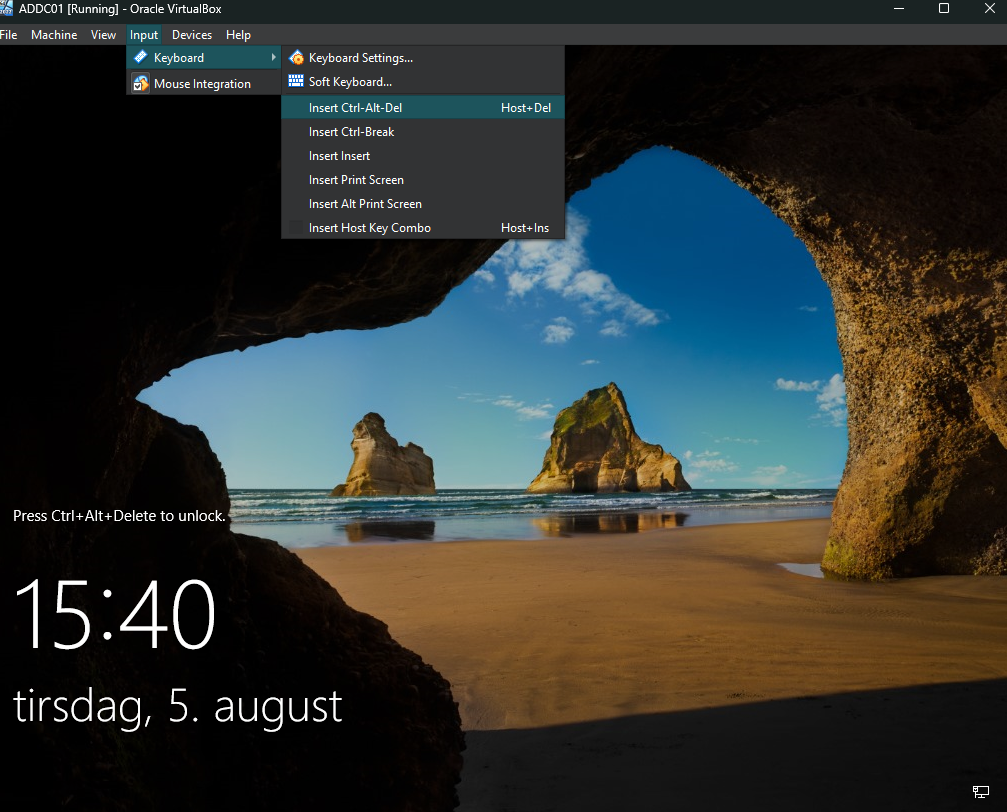
To be able to enter the password for the system, we need to hit CTRL+ALT+DEL, but this wont work. At the top of the Windows Server window, hit Input -> Keyboard -> Insert Ctrl-Alt-Del and then enter your password.
Once in, we’ll be greeted by the Server Manager application. This is what we’ll use to create our Active Directory environment later.
Minor Windows Server Configuration
Similar to the Windows 10 machine, we should set a static IP for our server. Select Use the following IP address and configure:
- IP address:
192.168.10.7 - Subnet mask:
255.255.255.0 - Default gateway:
192.168.10.1 - Preferred DNS server:
8.8.8.8(Google’s DNS for now)
We also need to change the Hostname of the server. To change it, search for This PC and click Properties.
Click Rename this PC and change it to Company-PC or whatever you want. Click Restart Now. Now our Hostname is what we changed it to.
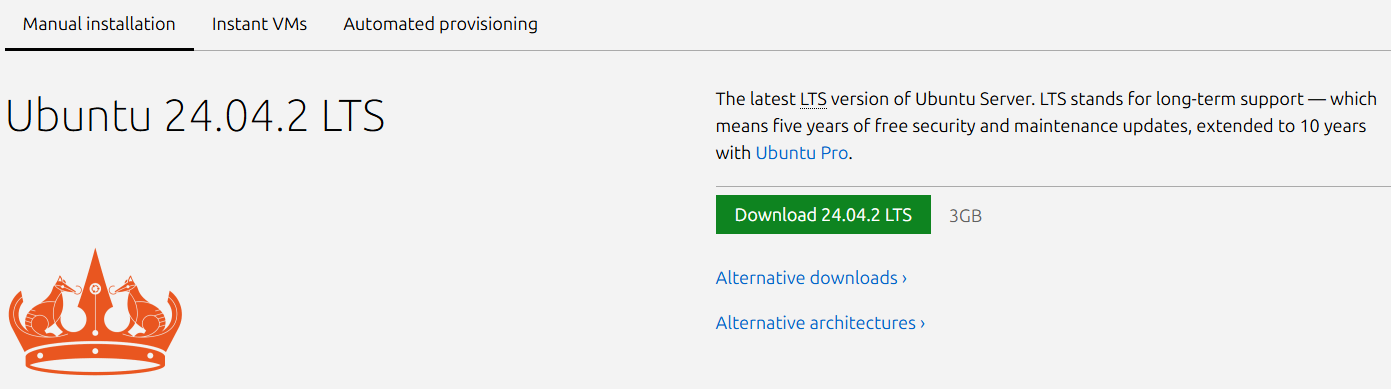
Downloading and Installing the Ubuntu Server
Navigate over to the Ubuntu website.
Ubuntu Server VirtualBox Setup
Open up VirtualBox and click New.
We are now presented with a screen where we need to choose:
- A name for our virtual machine
- The location of where to store the virtual machines data
- The location of the ISO image
- The version of the operating system we are installing
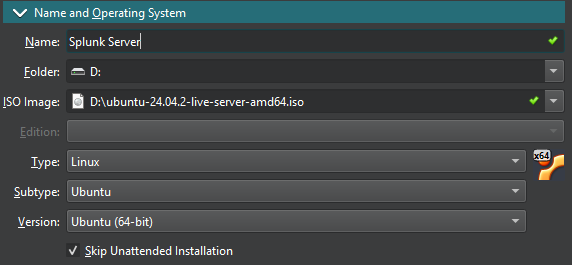
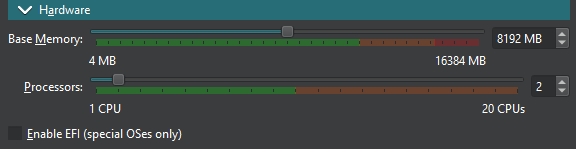
Now go to the Hardware tab. We should use 8192 MB of Base Memory and 2 Processors. We want our Splunk Server to have more memory and processing power, because it’ll be ingesting data and we’ll be running searches on it.
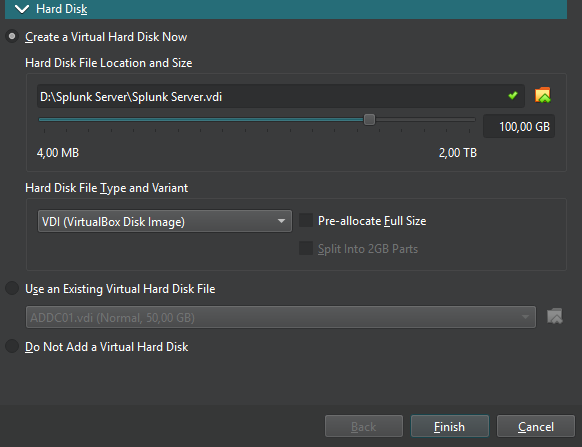
Under the Hard Disk section, we want to change it to 100 GB of storage and keep VDI. Once done click finish.
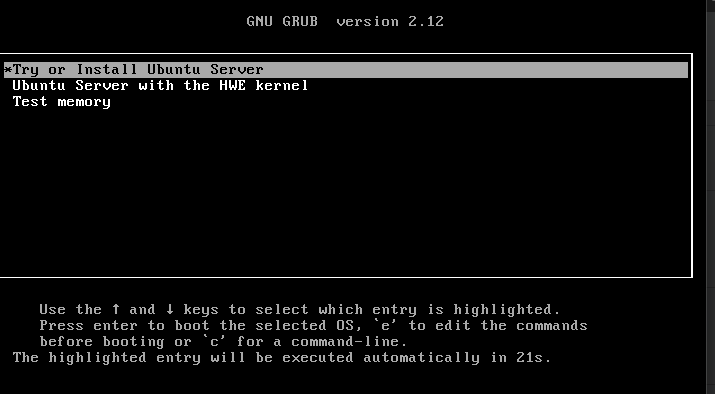
Now we can go ahead and boot up the Ubuntu Server by clicking Start.
The first screen we see is the GNU Grub bootloader. Click enter on the first option:
Then we need to choose our preferred language. Once done proceed to the next screen. where we can click enter on Continue without updating. The we need to choose our preferred keyboard settings.
Now we can skip the next couple screens, until we see the Mirror Check screen, which we can also skip by hitting Done and then Continue.
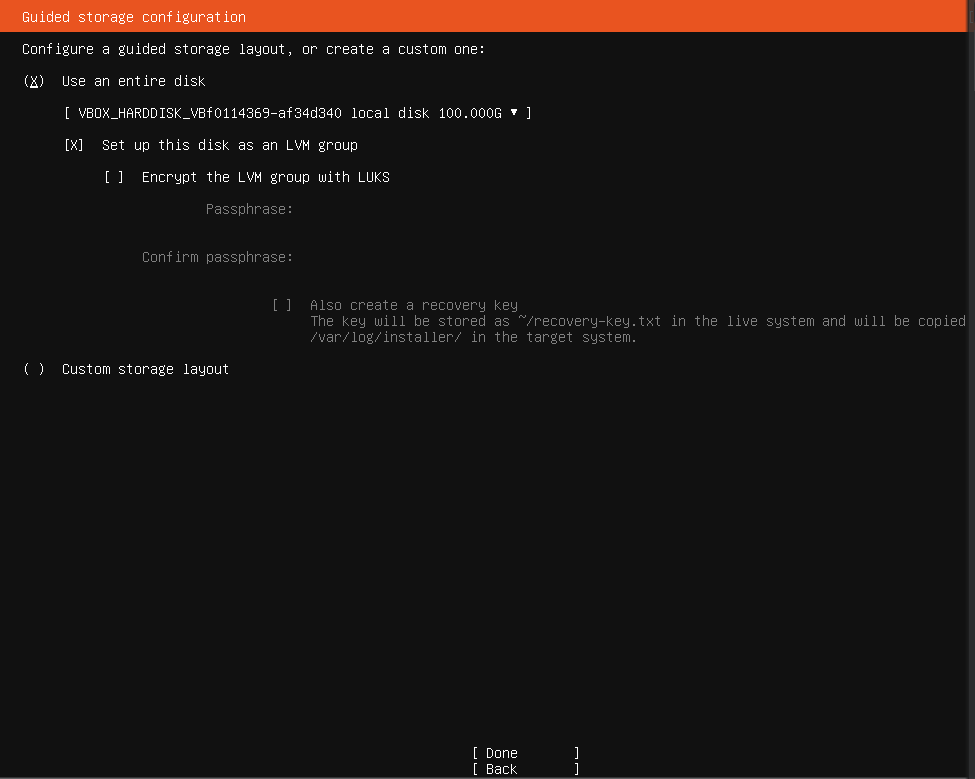
On the Guided storage configuration we need to use the arrow keys to go down and hit Done.
On the Summary screen we can click Done and then Continue
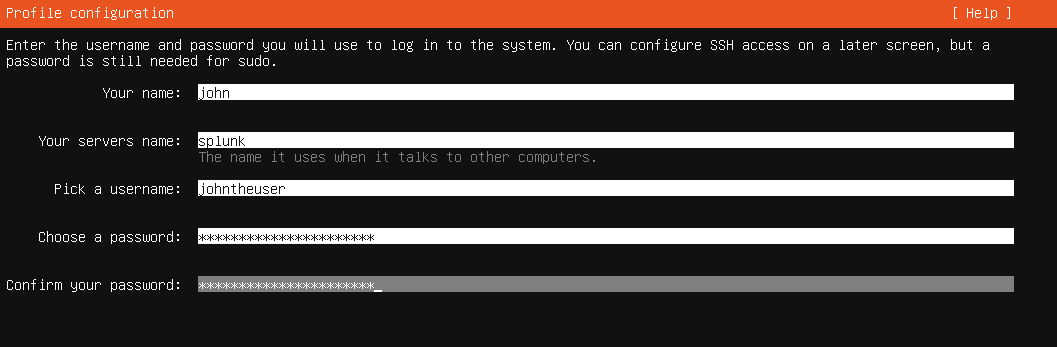
Then we can setup our user profile with a username and a password (I did johntheuser and EvenStrongerPassword96). Click Done.
We don’t need Ubuntu Pro, so we can skip that part.
It’s up to you, if you want to install OpenSSH or not. I’ll choose not to install it for now. Click Done.
We don’t need any of the Featured Server Snaps so click Done.
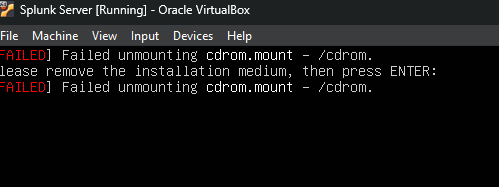
Now it’ll begin installing Ubuntu onto our virtual machine. Once the installation is complete, click Reboot Now.
We’ll see an error message, but don’t worry. Just click enter and it’ll work.
Once it’s done booting up we can use the username and password we made earlier. When you are logged in, we can update and upgrade our repositories using apt-get:
1
sudo apt-get update && sudo apt-get upgrade -y

Enter your password and it will start downloading and installing.
Next, we need to statically set an IP address, like we did on Windows. However on Ubuntu it’s a bit different. Use the command:
1
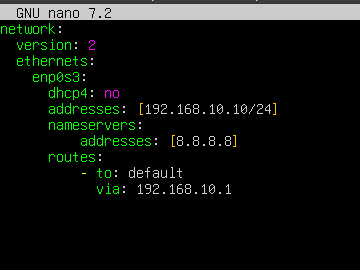
sudo nano /etc/netplan/50-cloud-init.yaml
Note: Your
.yamlfile name could be different from mine, but there should only be 1 file in the/etc/netplan/directory.
The file should look something like this:
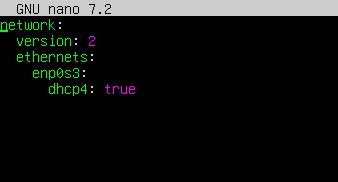
We are gonna turn off DHCP, add our static IP address, Google’s nameserver (for now) and our default gateway. The file should look something like this:
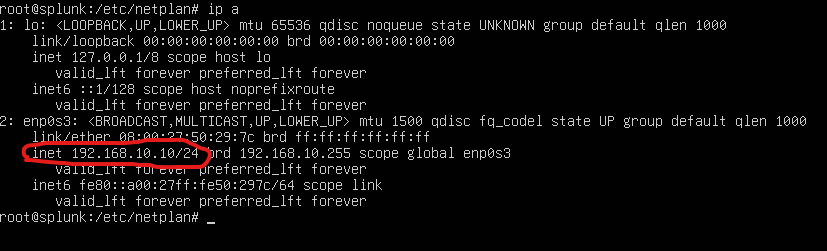
To save the file click Ctrl+X and then click Y and Enter. In the terminal window type this command:
1
sudo netplan apply
This will apply the settings. If we now type the command ip a, we will see our new static IP:
To make sure we have connectivity, we can do a simple ping google.com command:
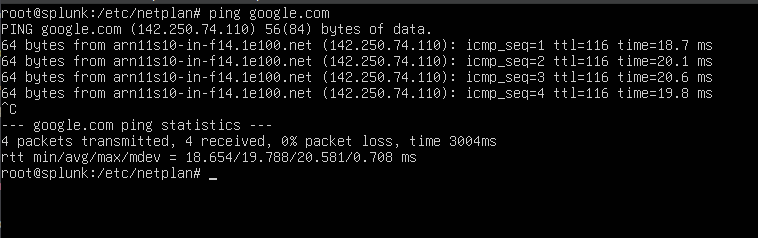
Success!
In part 2, we’ll set up Splunk on this server.
Network NAT Settings
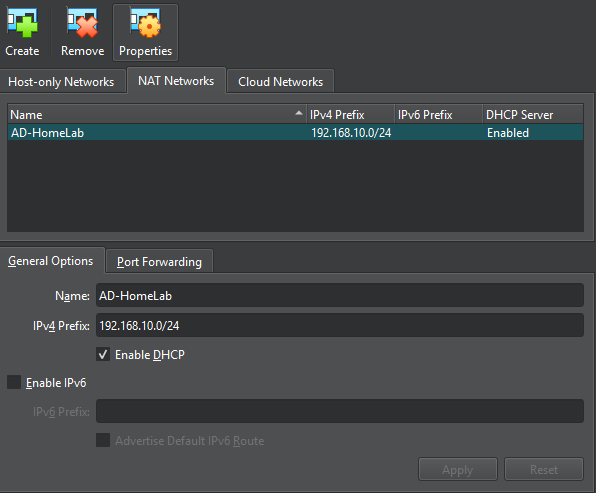
Next we need to create a NAT network that our machines can use. To do this, open up VirtualBox and click the three bullet points under Tools.

Then click Network. Go to Nat Networks and click Create. Double click the network we just created to change the name and the IPv4 Prefix. I’ll use the network prefix we designated in the diagram (192.168.10.0/24). Keep the Enable DHCP box checked and click Apply:
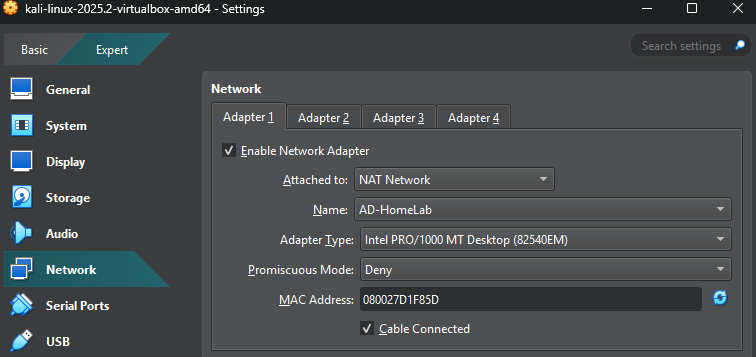
To put our virtual machines onto the network we just created, open up VirtualBox and click Settings -> Network. Change the Attached To: NAT to NAT Network and then the NAT network we created before. Do this for all your virtual machines.
What’s next?
This was part 1 of a small series of blog posts. In the next post we’ll configure Ubuntu server to add Splunk, create our Active Directory environment, configure the Splunk Universal Forwarder and more.